Introduction
Once upon a time, there was a blog called "A Cup of Java". Until one day the service where it was hosted shut down.
JavaFX ended up being the trigger that send me to find another blog service and start writing again.
I've been using Java and Swing for ages, but I always felt awkward building user interfaces in code, mixing them with event handlers and ending up with either an entire constellation of small classes or a hipper huge unmanageable class. Sometimes it worked well, others it became close to unmanageable.
Of course, JavaFX is not going to replace Swing but has some features I like. Of course, it is still possible to build an entire JavaFX user interface programmatically and assign a multitude of controllers to it. But the beauty of it is that it is possible to entirely separate the user interface from the code. Writing the interface in FXML allows one to easily design the user interface without the temptation of starting to code. It also has some new and very useful containers and as a bonus finally brings charts!
Having that itching in my hands to try it I started to re-write a small app I had made using Swing and a third-party charts library. The result was good, becoming much simpler than the original and working equally well but better looking.
Overview
In this article, I'll explain how to start writing applications using JavaFX and try a very simple example.
How to create a JavaFX application
My recipe for JavaFX is as follows:
- Build the user interface in FXML.
- Create a controller class like MyAppController.
- Create the main class like MyApp extending Application.
Let's do a hello world example
First step: create the FXML and save it as "hello.fxml":
<?xml version="1.0" encoding="UTF-8"?>

<?import java.net.*?>
<?import javafx.geometry.*?>
<?import javafx.scene.control.*?>
<?import javafx.scene.layout.*?>
<?import javafx.scene.text.*?>

<StackPane>
   <Label text="Hello World"/>
</StackPane>
Second step: this example has no interactions so there is no need for a controller, skip this step.
Third step: create the main class Hello and save it as "Hello.java":
import java.io.IOException;

import javafx.application.Application;
import javafx.fxml.FXMLLoader;
import javafx.scene.Scene;
import javafx.scene.Parent;
import javafx.stage.Stage;

/**
 * @author António Raposo
 */
public class Hello extends Application {

   @Override
   public void start(Stage primaryStage) throws IOException {
      Parent root = FXMLLoader.load(getClass().getResource("hello.fxml"));
      Scene myScene = new Scene(root);
      primaryStage.setScene(myScene);
      primaryStage.setWidth(400);
      primaryStage.setHeight(300);
      primaryStage.show();
   }

   public static void main(String[] args) {
      launch(args);
   }

}
Now compile and run. Here is how it looks.
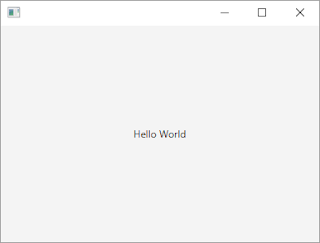

Conclusion
If you followed these steps you just created your first JavaFX application.
No comments:
Post a Comment